本文最后更新于:2 个月前
破冰
🥣 推荐阅读:
Nginx 是什么
1 Nginx(发⾳为“engine-x ”)是⼀个⾼性能的开源 Web 服务器和反向代理服务器,可以处理⼤ 量的并发连接和请求。它使⽤事件驱动的异步架构和多线程设计,可以⾼效地处理并发请求, 同时也⽀持反向代理、负载均衡、动态HTTP缓存、SSL/TLS终⽌、基于模块的扩展等功能。
Nginx 的应⽤场景⾮常⼴泛,以下是其中的⼏个:
Web 服务器: Nginx 可以作为 HTTP 服务器,处理并发的静态请求和动态请求,并且可 以⽀持负载均衡和缓存,为⽹站提供⾼性能和⾼可⽤性。
反向代理服务器: Nginx 可以作为反向代理服务器,接收客户端请求并将其转发到后端服 务器,同时也可以⽀持负载均衡和缓存。
邮件代理服务器: Nginx 可以作为邮件代理服务器,⽀持 POP3、IMAP 和 SMTP 协议, 并且可以⽀持 SSL/TLS 加密和反垃圾邮件功能。
流媒体服务器: Nginx 可以作为流媒体服务器,⽀持 RTMP、HLS 和 DASH 协议,可以 ⽤于实现直播、点播和视频-on-demand(VoD)等场景。
总之,Nginx 具有⾼性能、可扩展性和可靠性等特点,被⼴泛应⽤于⼤型⽹站、互联⽹公司、 云计算、视频流媒体、游戏等领域
思维碰撞 启动
2026 年 1 月 30 日
1
2
3
4
5
6
[root@iZ2zehqnajgv7sc3i778n0Z ~]"./entrypoint.sh ./m…" 6 months ago Up 2 days 0.0.0.0:5230->5230/tcp, :::5230->5230/tcp memos"docker-entrypoint.s…" 7 months ago Up 2 days 0.0.0.0:80->80/tcp, :::80->80/tcp root-wordpress-1"docker-entrypoint.s…" 7 months ago Up 2 days 0.0.0.0:3306->3306/tcp, :::3306->3306/tcp, 33060/tcp root-db-1
1 docker stop e9f71f7b68d5
三招速查本机端口占用_查看端口占用情况-CSDN博客
window 查看本机端口占用信息。
1 netstat -ano | findstr :80
1
2
3
4
5
6
7
8
9
10
11
C :\WINDOWS\system32>netstat -ano | findstr :80 TCP 192.168.1.108:57632 124.236.65.111:80 CLOSE_WAIT 10436 TCP 192.168.1.108:57633 124.236.65.111:80 CLOSE_WAIT 10436 TCP 192.168.1.108:57634 124.236.65.111:80 CLOSE_WAIT 10436 TCP 192.168.1.108:57635 124.236.65.111:80 CLOSE_WAIT 10436 TCP 192.168.1.108:57636 124.236.65.111:80 CLOSE_WAIT 10436 TCP 192.168.1.108:57637 124.236.65.111:80 CLOSE_WAIT 10436 TCP 192.168.1.108:57887 1.71.88.62:80 CLOSE_WAIT 616 TCP 192.168.1.108:57895 1.71.88.62:80 CLOSE_WAIT 616 TCP 192.168.1.108:61912 1.194.31.52:80 CLOSE_WAIT 11008 TCP 192.168.1.108:61933 23.221.103.220:80 ESTABLISHED 13948
linux 查看本机端口占用信息。
1 netstat -tulnt | grep 80
1
2
3
[root@iZ2zehqnajgv7sc3i778n0Z nginx]
1
2
3
4
5
6
7
8
9
[root@iZ2zehqnajgv7sc3i778n0Z nginx]
改了配置文件端口分配后重启 Nginx 服务,个人博客最新访问地址:Memory’s blog
2026 年 1 月 28 日
1 cat /var/log/nginx/error.log
1
2
2026/01/29 09:22:21 [error] 3459
1
2
3
4
5
6
7
8
9
10
11
12
13
14
[master ece2c620] Site updated: 2026-01-29 09:46:41done .done .done .done .local objects.'2023' : Permission denied'master' set up to track 'git@47.93.135.62:/home/git/hexo.git/master' .done : git
阿里云的密码:
/data/hexo/blog,这个目录是 root 用户创建的,git 用户没有权限操作。
1 sudo chmod -R 777 /data/hexo/blog
1 chown -R git:nginx /data/hexo/blog
1 chmod -R 775 /data/hexo/blog
保持所有者为 git:不影响后续 Hexo 推送(git 用户需要写入权限)。
所属组改为 nginx:nginx 用户能通过组权限访问目录下的静态文件。
权限 775:既保证 git 能读写、nginx 能读写执行,又避免其他用户有写入权限,更安全。
1 http ://47.93.135.62:8081 /11 .html
一个很奇怪的问题,静态文件都不能正常访问,图片啥的都不行,但同级目录下的 html 文档却正常,是不是新增的静态文件缓存有问题。
删了试试。
妈的搞一早上,到现在为止就剩下文件访问权限和访问路径问题,本机和服务端都得考虑怎么解决,乱糟糟的。
先放一放。
好,图片正常访问。
接下来就是路径问题了1,格式和首页图片未正常显示统一为路径问题,/blog前缀究竟是在哪里配置强制加上的。
Memory’s blog
1 2 3 4 5 6 7 8 9 10 11 12 13 root: / permalink: :year/:month/:day/:title/ permalink_defaults: pretty_urls: trailing_index: true trailing_html: true
推送成功。
下午研究下域名解析,时隔整整两个月个人博客重新上线。
2026 年 1 月 27 日
解决访问 Nginix 403 问题。
执行结果是这样的,用于临时解决访问 403 问题,开机重启后就又失效了。
1
2
3
4
5
[root@localhost ~]
getenforce 功能:显示SELinux的当前执行模式,返回值为:
Enforcing:强制模式,阻止所有违反安全策略的操作(默认模式)。Permissive:宽容模式,仅记录违规行为但不阻止,用于调试。Disabled:禁用模式,SELinux完全关闭(需通过配置文件修改,非此命令直接输出)。
setenforce 命令能临时切换 SELinux 模式(需root权限),仅支持Enforcing 与 Permissive 互切(如 setenforce 1 设为强制模式,setenforce 0 设为宽容模式),无法直接设为 Disabled(需修改配置文件)。
更改是临时的,重启后恢复配置文件设置(/etc/selinux/config),永久修改需编辑该文件(如 SELINUX=enforcing)并重启系统。
Nginx 烦人的 403 错误-腾讯云开发者社区-腾讯云
1 semanage permissive -a httpd_t
执行以上命令,将 http 加入到信任的列表中。
下午,访问阿里云服务器又出现了这个错误,尝试别的解决方案。
检查目录权限和所有者。
1 2 3 4 5 6 7 8 9 10 ls -la /data/hexo/ls -ld /data/hexo/cat /usr/local/nginx/conf/nginx.conf | grep "user"
设置静态文件缓存。
1
2
3
4
5
6
7
8
9
10
11
12
13
14
15
16
17
18
19
20
21
22
23
24
25
26
27
28
29
30
31
32
33
34
35
36
37
38
user nginx;'$remote_addr - $remote_user [$time_local] "$request" ' '$status $body_bytes_sent "$http_referer" ' '"$http_user_agent" "$http_x_forwarded_for"' ;
1
2
3
4
5
6
7
8
9
10
11
12
13
14
15
16
17
18
19
20
21
22
23
24
25
26
27
28
29
30
31
32
server {"public, immutable" ;
Memory’s blog
阿里云服务器部署博客,还有些问题,静态文件缓存。
2026 年 1 月 26 日
1
2
3
4
5
[root@localhost git]
1
2
3
4
5
[root@localhost git]
1 sudo systemctl stop nginx
1 sudo systemctl start nginx
1
2
3
4
5
6
7
8
9
10
11
12
13
14
15
16
17
18
19
20
[root@localhost git]test is successful
访问403。
1 sudo tail -f /var/ log/nginx/ error.log
1
2
3
4
5
6
7
8
9
10
11
12
13
14
15
16
17
[root@localhost git]# sudo tail -f /var/log/nginx/error.logerror ] 6871#6871: *2 open() "/data/hexo/blog/img/artical/cloud20240729.jpg" failed (2: No such file or directory), client: 192.168.139.1, server: 192.168.139.128, request: "GET /blog/img/artical/cloud20240729.jpg HTTP/1.1" , host: "192.168.139.128" , referrer: "http://192.168.139.128/" error ] 6871#6871: *1 open() "/data/hexo/blog/img/artical/rain20240729.jpg" failed (2: No such file or directory), client: 192.168.139.1, server: 192.168.139.128, request: "GET /blog/img/artical/rain20240729.jpg HTTP/1.1" , host: "192.168.139.128" , referrer: "http://192.168.139.128/" error ] 6871#6871: *1 open() "/data/hexo/blog/img/police_beian.png" failed (2: No such file or directory), client: 192.168.139.1, server: 192.168.139.128, request: "GET /blog/img/police_beian.png HTTP/1.1" , host: "192.168.139.128" , referrer: "http://192.168.139.128/" error ] 6871#6871: *1 open() "/data/hexo/blog/img/newBG/sunset.jpg" failed (2: No such file or directory), client: 192.168.139.1, server: 192.168.139.128, request: "GET /blog/img/newBG/sunset.jpg HTTP/1.1" , host: "192.168.139.128" , referrer: "http://192.168.139.128/" error ] 6871#6871: *1 "/data/hexo/index.html" is forbidden (13: Permission denied), client: 192.168.139.1, server: 192.168.139.128, request: "GET / HTTP/1.1" , host: "192.168.139.128" error ] 6871#6871: *1 "/data/hexo/index.html" is forbidden (13: Permission denied), client: 192.168.139.1, server: 192.168.139.128, request: "GET / HTTP/1.1" , host: "192.168.139.128" error ] 6871#6871: *1 "/data/hexo/index.html" is forbidden (13: Permission denied), client: 192.168.139.1, server: 192.168.139.128, request: "GET / HTTP/1.1" , host: "192.168.139.128" error ] 6871#6871: *1 "/data/hexo/index.html" is forbidden (13: Permission denied), client: 192.168.139.1, server: 192.168.139.128, request: "GET / HTTP/1.1" , host: "192.168.139.128" error ] 6871#6871: *7 "/data/hexo/index.html" is forbidden (13: Permission denied), client: 192.168.139.1, server: 192.168.139.128, request: "GET / HTTP/1.1" , host: "192.168.139.128" error ] 6871#6871: *7 "/data/hexo/index.html" is forbidden (13: Permission denied), client: 192.168.139.1, server: 192.168.139.128, request: "GET / HTTP/1.1" , host: "192.168.139.128" error ] 6871#6871: *7 "/data/hexo/index.html" is forbidden (13: Permission denied), client: 192.168.139.1, server: 192.168.139.128, request: "GET / HTTP/1.1" , host: "192.168.139.128" error ] 6871#6871: *7 "/data/hexo/index.html" is forbidden (13: Permission denied), client: 192.168.139.1, server: 192.168.139.128, request: "GET / HTTP/1.1" , host: "192.168.139.128" error ] 6871#6871: *7 "/data/hexo/index.html" is forbidden (13: Permission denied), client: 192.168.139.1, server: 192.168.139.128, request: "GET / HTTP/1.1" , host: "192.168.139.128" error ] 6871#6871: *7 "/data/hexo/index.html" is forbidden (13: Permission denied), client: 192.168.139.1, server: 192.168.139.128, request: "GET / HTTP/1.1" , host: "192.168.139.128" error ] 6871#6871: *7 "/data/hexo/index.html" is forbidden (13: Permission denied), client: 192.168.139.1, server: 192.168.139.128, request: "GET / HTTP/1.1" , host: "192.168.139.128" error ] 6871#6871: *7 "/data/hexo/index.html" is forbidden (13: Permission denied), client: 192.168.139.1, server: 192.168.139.128, request: "GET / HTTP/1.1" , host: "192.168.139.128"
权限不足,日志关键信息:
1 "/data/hexo/index.html" is forbidden (13 : Permission denied)
原因 :
Nginx进程用户(通常是nginx或www-data)没有读取/data/hexo/目录的权限
SELinux可能阻止了访问(如果是CentOS/RHEL)
目录或文件的权限设置不正确(如755或644
1 2 3 4 5 6 7 8 9 10 11 12 ls -la /data/hexo/ chmod -R 755 /data/hexo/chown -R nginx:nginx /data/hexo/ chcon -Rt httpd_sys_content_t /data/hexo/
文件缺失,日志关键信息:
1 open () "/data/hexo/blog/img/artical/cloud20240729.jpg" failed (2 : No such file or directory )
网页引用的静态资源(图片等)路径错误或文件不存在。
Hexo生成的静态文件未正确部署到/data/hexo/。
1 2 3 4 5 6 7 8 ls /data/hexo/blog/img/artical/ cd /path/to/your/hexo/projectcp -r public/* /data/hexo/
修改 Nginx 配置文件。
1
2
3
4
5
6
7
8
9
10
11
12
13
14
15
16
17
18
19
20
21
22
23
24
25
26
27
28
29
user nginx;'$remote_addr - $remote_user [$time_local] "$request" ' '$status $body_bytes_sent "$http_referer" ' '"$http_user_agent" "$http_x_forwarded_for"' ;
1
2
3
4
5
6
7
8
9
10
11
12
13
14
15
server {
我看这里获取静态文件的路径,报错估计跟本地配置文件有关系。
1 2026 /01 /26 01 :26 :11 [error] 6871#6871: *2 open() "/data/hexo/blog/img/artical/cloud20240729.jpg" failed (2: No such file or directory), client: 192.168.139.1, server: 192.168.139.128, request: "GET
编辑本地 _config.yml 文件。
1 2 3 4 5 6 7 8 9 10 11 12 13 url: https://deng-2022.github.io/ root: permalink: :year/:month/:day/:title/ permalink_defaults: pretty_urls: trailing_index: true trailing_html: true
检查 nginx 配置。
1
2
nginx: the configuration file /etc/nginx/nginx.conf syntax is okfile /etc/nginx/nginx.conf test is successful
重启。
站点正常访问,但文件访问路径仍有问题,跟本地没关系,改了本地的配置连上传文件都报错了,修改服务端钩子文件配置。
1 cd /home/gi t/hexo.git/ hooks
1 git --work-tree=/data/ hexo/blog --git-dir=/ home/git/ hexo.git checkout -f
改完这些还要记得赋予权限,要不本地推送显示成功但文件没有推送到远程仓库。
1 chmod +x ~/hexo.git/ hooks/post-receive
1 sudo chmod -R 777 /data/ hexo/blog
推送,hexo cl,hexo g,hexo d。
1
2
3
4
5
6
7
8
9
deploy: type: git repo: git@192.168.139.128:/home/git/hexo.git branch: master
没错啊,刚才全程用 root 操作,权限没起作用,换成 git 用户再操作一遍。
重新执行一遍完整的推送。
Memory’s blog
部署成功,结束。
Nginx 部署静态站点(2024 最新)
2024 年 6 月 3 日
Nginx 安装 这里推荐宝塔面板安装,一条龙完成:
安装宝塔面板:
访问宝塔面板:
一键编译安装:
记得查看默认访问端口,宝塔面板安装下的 nginx 默认是 888 端口,云服务器也要开放 888 端口
搞完了直接访问就行。
尝试部署静态页面 接下来就是四十八小时时间里的踩坑记录 ,仅供参照:
2024 年 6 月 1 日
【一篇学会】Nginx 静态资源部署保姆级教程_nginx 部署静态资源-CSDN 博客
Nginx 静态资源服务的配置-腾讯云开发者社区-腾讯云 (tencent.com)
1
2
MIME 类型6838 中进行了定义和标准化,由互联网号码分配机构(IANA)负责跟踪所有官方MIME类型。MIME类型由两部分组成:类型(type )和子类型(subtype ),它们之间用斜杠(/)分隔,不允许空格存在。MIME类型对大小写不敏感,但传统写法都是小写
Nginx 配置文件详解-CSDN 博客
8 分钟用 Nginx 搭建一个自己的网站_哔哩哔哩_bilibili
Linux 使用 nginx 部署静态网页 - WindSnowLi - 博客园 (cnblogs.com)
手把手教你搭建静态/博客网站 | 起凡 Code 闲聊 (jarcheng.top)
跟着网上的教程搞了一下午,就是部署不了静态页面,甚至连访问 Nginx 本身都好像有问题,搞不明白,实在是搞不明白。
不管怎么说,今晚我就死磕这个 Nginx 了,多少个晚上都像现在这样把它放过,所以到现在都没有学习完成过 Nginx。
2024 年 6 月 2 日
[root@iZ2ze4yceifsrmdejokfymZ ~]# nginx
[Nginx 重启时提示”nginx: emerg] bind() to 0.0.0.0”解决方法 - 八艾云 (8a.hk)
极简 Nginx 学习 + 使用,点到为止 - 编程导航文章 (code-nav.cn)
1 2 3 4 5 6 7 8 9 10 11 12 13 14 15 16 17 18 19 20 21 22 23 24 25 要查看当前用户是否是管理员(在Unix和Linux系统中通常指的是root用户,或在Windows系统中指的是具有管理员权限的用户),你可以使用不同的方法,具体取决于你使用的操作系统。whoami 命令。如果输出是 root,那么你就是管理员。id 命令。如果UID(用户ID)是0,那么你就是root用户。cat /etc/passwd命令,并查找以root:开头的行。whoami /groups(在命令提示符中):
netstat -tulnp | grep 7010
我已经尝试了所有方法,查看冲突端口号、关闭防火墙,修改执行用户,更改文件目录权限,根本部署不了静态页面
3 分钟搞懂阿里云服务器安装 Nginx 并配置静态访问页面_阿里云服务器如何安装 nginx-CSDN 博客
[nginx: error] invalid PID number “” in “/usr/local/webserver/nginx/logs/nginx.pid”-CSDN 博客
1 nginx -c /www/ server/nginx/ conf/nginx.conf
搞不定,一夜回到解放前。
Nginx 部署与静态 html_nginx 部署 html-CSDN 博客
【Linux 报错】登陆 mysql 用户报错 This account is currently not available._mysql:x:1001:-CSDN 博客
2024 年 6 月 3 日
Linux 实现 Nginx 的安装与部署并实现 html 静态资源访问_linux nginx html-CSDN 博客
1
2
3
4
5
6
7
8
9
10
11
12
13
14
15
[nginx-stable] name =nginx stable repobaseurl =http://nginx.org/packages/centos/7 /$basearch /gpgcheck =1 enabled =1 gpgkey =https://nginx.org/keys/nginx_signing.keymodule_hotfixes =true [nginx-mainline] name =nginx mainline repobaseurl =http://nginx.org/packages/mainline/centos/7 /$basearch /gpgcheck =1 enabled =0 gpgkey =https://nginx.org/keys/nginx_signing.keymodule_hotfixes =true
1
2
sudo yum clean all
1 grep -r exclude /etc/yum .conf /etc/yum .repos.d/
1
2
systemctl start nginx ps -aux | grep nginx
1
2
systemctl restart nginxstatus nginx
1
2
3
4
find / -name nginx.conf cd ..find -name nginx.conf
1
2
3
4
5
6
7
8
9
10
11
12
13
14
15
16
17
18
19
20
21
22
23
24
25
26
27
28
29
30
31
32
33
34
35
36
37
38
39
40
41
42
43
44
server {listen 80 ;server_name localhost;autoindex on ;location / {root /usr/share/nginx/html;index index.html index.htm;error_page 500 502 503 504 /50x.html;location = /50x.html {root /usr/share/nginx/html;
nginx 服务器搭建好但是浏览器却无法访问原因排查_nginx 配置好了 网站还是访问不了-CSDN 博客
这几天里报错最恶心的还是这条:
1 nginx: [emerg] bind() to 0.0 .0.0 :7010 failed (98 : Unknown error )
最后是在宝塔面板卸载重装以后才解决的,现在也不知道什么原因。
还是很有收获的,学到了许多其他新知识。
2024 年 6 月 4 日
linux 怎么快速卸载并安装 node 环境 - Jun_ct - 博客园 (cnblogs.com)
yum、apt-get、wget 的区别_yum wget-CSDN 博客
wget、yum、rpm、apt-get 区别「建议收藏」-腾讯云开发者社区-腾讯云 (tencent.com)
Linux curl 命令最全详解-CSDN 博客
云服务器部署静态博客站点,搞了一上午,代码推送不上去,Nginx 也起不来了。
运维排查篇 | 访问 nginx 出现 403 错误 - 知乎 (zhihu.com)
过了一个小时再尝试,静态代码文件就能推送上去了。杀死已经启动的 Nginx 进程,也能成功启动 Nginx 了。
问题解决
2024 年 6 月 3 日
查看本实例的安全组,应用了哪个安全组规则:
以下这就是应用到的真正的安全组规则(注意上方地域选择 ):
这几天以来,一直选错了地域,搞另一个地域下的安全组规则。原来根本就没放开 80、7010、7020 端口:
重启失败
2024 年 6 月 4 日
这个报错直接杀死正在运行的 Nginx 进程就可以了。
访问 403 错误
2024 年 6 月 4 日
🥣 推荐阅读:运维排查篇 | 访问 nginx 出现 403 错误 - 知乎 (zhihu.com)
一条龙
2024 年 6 月 3 日
🥣 安装 Nginx 并部署静态页面,看这篇博客:服务器——Nginx 安装及静态配置、部署 - 知乎 (zhihu.com)
🍚 解决 Nginx 访问失败问题,看这篇博客:nginx 服务器搭建好但是浏览器却无法访问原因排查_nginx 配置好了 网站还是访问不了-CSDN 博客
1 firewall-cmd --zone =public --add-port =8080/tcp --permanent
使用 Nginx 部署 博客站点,看:
CPU 爆满
2024 年 6 月 21 日
最近一周云服务器 CPU 负载一直很高,经常在 80%左右,博客访问都卡的根本打不开。
Nginx 性能优化_nginx cpu 负载高-CSDN 博客
清除 nginx 连接数 TIME_WAIT_nginx 连接数满了-CSDN 博客
如何查看 Linux 系统 I/O 负载情况_云服务器 ECS(ECS)-阿里云帮助中心 (aliyun.com)
云服务器一直提示达到云盘类型的 IOPS 上限_读写 io 延迟过长,或达到了该云盘类型的 iops 上限,导致实例云盘读写受限-CSDN 博客
swappiness 的基本默认设置为 60,加上生效这样便完成修改设置 | 《Linux 就该这么学》 (linuxprobe.com)
我又重启了服务器实例,试了下上面的方法,看看是否有效。
半个小时过去了,好像问题还真的解决了:
2024 年 7 月 4 日
2024 年 7 月 8 日
还是老问题:
服务器的 CPU 一直负载很高,监控告警也提示:
当前实例的云盘在 2024 年 7 月 4 日 09:43:00 出现读写 I0 延迟过长,或达到了该云盘类型的 I0PS 上限,导致实例云盘读写受限。
想要远程连接排查问题,Workbench 远程连接服务器又提示已禁用账号密码登录。
改用 VNC 远程连接,进去后没有任何反应,只能胡乱敲字母。
CPU 负载解决不了,部署在服务器上的博客也访问不到。
【Linux】iftop 命令详解-CSDN 博客
云服务器管理控制台 (aliyun.com)
Linux(CentOS)网络流量实时监控(iftop)安装教程——含 yum 命令安装失败方法_centos iftop-CSDN 博客
2024 年 7 月 9 日
AtomGit Pages 服务下的博客是 HTTPS 协议的,七牛云存储空间绑定的域名目前没有部署 SSL 证书,仅支持 HTTP 协议。
这图片还显示不了了。
又打回了云服务器部署博客的注意,今天早上 CPU 都爆满到 90% 了,肯定出问题了。
拒绝服务漏洞?这不就是问题的原因所在吗,摆明了在这我都没想过这个问题。。
阿里云漏洞库 (aliyun.com)
按量付费,一次两块钱,我试试看。
晚上,睡觉前:
Nodejs 安装
2024 年 6 月 3 日
linux 安装 nodejs yum
在 Linux 系统中,您可以使用 Yum 包管理器来安装 Node.js。以下是一个基本的步骤和示例代码,用于通过 Yum 安装 Node.js:
首先,您需要确保您的系统中已经安装了 Node.js 的官方 Yum 仓库。如果尚未安装,您可以通过运行以下命令来添加 Node.js 的仓库:
这个命令会将 Node.js 14.x 的仓库添加到您的系统中。如果您想安装其他版本的 Node.js,只需将setup_14.x中的数字更改为所需的 Node.js 版本即可。
接下来,您可以使用 Yum 安装 Node.js:
1 sudo yum install -y nodejs
这个命令会从刚才添加的 Node.js 仓库中安装 Node.js。
安装完成后,您可以检查 Node.js 的版本确保安装成功:
请注意,上述命令中的 URL 和版本号可能会随着 Node.js 版本更新而变化,请参照 Node.js 官方文档或者 NodeSource 提供的最新安装脚本。
部署 看过了上面的一条龙 Nginx 部署静态站点服务后,基本上搞定了所有 Nginx 问题
Nginx 安装
2024 年 6 月 9 日
注意,这里还是上面提到的那篇博文内容,感觉还是把详细步骤记录下来比较好:
安装 Nginx 步骤 有两种安装 Nginx 方法:
一种是快速安装,直接执行下面代码即可:
另一种是设置 nginx.repo 源安装,我们推荐使用设置 nginx.repo 源安装,具体步骤如下所示:
安装 yum-utils 在安装之前,首先要安装 yum-utils,执行如下代码:
配置 nginx.repo 源 首先在/etc/yum.repos.d 目录下创建 nginx.repo 文件,执行如下代码:
1 touch /etc/yum.repos.d/nginx.repo
在 nginx.repo 文件中写入以下代码:
1
2
3
4
5
6
7
8
9
10
11
12
13
14
15
16
17
vim /etc/yum.repos.d/nginx.repo $releasever /$basearch /true $releasever /$basearch /true
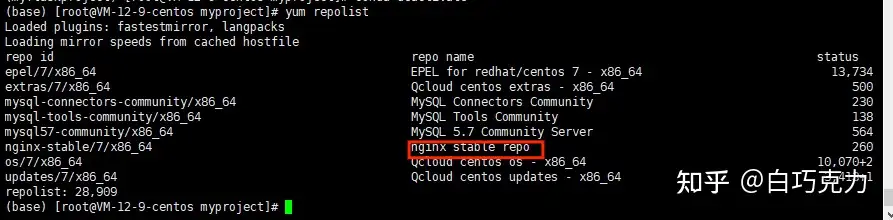
写入文件后,保存并退出,执行如下代码查看是否加载了 Nginx 安装源:
安装 nginx 安装 nginx 执行如下代码即可安装:
系统启动 nginx 服务器 在系统管理中,我们可以执行如下代码启动 nginx 服务器:
1
2
systemctl start nginx
如下图所示:
这样就启动了 nginx 服务器,我们进入浏览器并输入公网 id 即可看到如下页面:
假如没能成功显示该页面,则需要在云服务器开放 80 端口。
nginx.conf 配置 为什么输入本机的 IP 地址就会显示上面的网页呢,带着疑问,我们来看看 Nginx 的配置文件,nginx 默认的配置文件 nginx.conf 的目录为:/etc/nginx/nginx.conf,也可以执行如下代码找出 nginx.conf 的位置:
如下图所示:
找到 nginx.conf 配置文件路径后,进入 nginx.conf 配置文件:
1
2
3
4
5
6
7
8
9
10
11
12
13
14
15
16
17
18
19
20
21
22
23
24
25
26
27
28
29
30
31
32
vim /etc/nginx/nginx.conf'$remote_addr - $remote_user [$time_local] "$request" ' '$status $body_bytes_sent "$http_referer" ' '"$http_user_agent" "$http_x_forwarded_for"' ;
其内容如下所示:
1
2
3
4
5
6
7
8
9
10
11
12
13
14
15
16
17
18
19
20
21
22
23
24
25
26
27
28
29
30
31
user nginx; '$remote_addr - $remote_user [$time_local] "$request" ' '$status $body_bytes_sent "$http_referer" ' '"$http_user_agent" "$http_x_forwarded_for"' ;
我们在 nginx.conf 配置文件中没有找到呈现刚才网页直接相关的代码,只有一个辅助配置文件,那么我们执行如下代码进入复制配置文件目录:
发现只有一个名为 default.conf 的配置文件,执行如下代码进入 default.conf 辅助配置文件:
1 vim /etc/nginx/conf.d/*.conf
其内容如下所示:
1 2 3 4 5 6 7 8 9 10 11 12 13 14 15 16 17 18 19 20 21 22 23 24 25 26 27 28 29 30 31 32 33 34 35 36 37 38 39 40 41 42 43 server {
在辅助配置文件中,我们找到了网页项目文件相关的代码,我们进入/usr/share/nginx/html 项目路径,执行如下代码:
1 vim /usr/share/nginx/html/index.html
打开 index.html,发现其内容正是我们刚才公网 id 访问浏览器显示的内容。
也就是说,只要我们修改 default.conf 配置文件中的项目路径改为我们项目的路径,即可把我们的项目放在服务器上面了,但是一般情况下,我们都不会去修改 nginx 原来的 default.conf 配置文件,一般会通过使用自定义的配置文件来启动 nginx 服务。
关闭 nginx 服务器 当我们使用系统管理来启动 nginx 服务器时,需要系统管理来关闭 nginx 服务器,执行如下代码:
可以根据需求执行如下代码:
1 2 3 4 5 6 enable nginx disable nginx
配置文件启动 nginx 服务 在使用系统管理启动 nginx 服务时,浏览器访问自身的 IP 地址呈现的是一个欢迎使用 nginx 服务的网页,要想浏览器访问自身的 IP 地址呈现的是其他网页时,需要修改其辅助配置文件 default.conf,但一般情况下,我们不会去修改 nginx 原来的 default.conf 配置文件,那么怎么启动 nginx 服务器让浏览器访问自身 IP 地址呈现其他网页呢?
这时我们可以自己编写一个 nginx 配置文件 mynginx.conf(配置文件名可以随意),执行以下代码来启动 nginx 服务:
配置文件编写 那么问题来了,如何编写 nginx 配置文件呢?首先系统管理启动 nginx 服务涉及了两个配置文件——nginx.conf 和 default.conf,其中控制网页内容的呈现相关的是 default.conf 配置文件,而 nginx.conf 是一些日志、错误等一些文件配置,所以我们只需要把 nginx.conf 配置文件和 default.conf 配置文件的内容复制在自己编写的 mynginx.conf 配置文件即可,复制代码后,我们通过增删改查,最终得出以下代码:
1 2 3 4 5 6 7 8 9 10 11 12 13 14 15 16 17 18 19 20 21 22 23 24 25 26 27 28 29 30 31 32 33 34 35 36 37 user root; '$remote_addr - $remote_user [$time_local] "$request" ' '$status $body_bytes_sent "$http_referer" ' '"$http_user_agent" "$http_x_forwarded_for"' ;
修改的地方我们已经在代码中注释了,好了,通过简单的修改复制的代码,我们成功编写了自己的 nginx 配置文件 mynginx.conf,我们将配置文件放在 Flask 程序根目录中。
Flask 程序如下所示:
1 2 3 4 5 6 7 8 9 10 from flask import Flask, render_template'DEBUG' ]=True'ENV' ]='development' '/' )return render_template('Hello.html' )if __name__ == '__main__' :
启动 nginx 服务 好了,配置文件已经写好了,执行如下代码启动 nginx 服务:
1 2 nginx -c /root/demo/myflask/mynginx.conf
这样我们就启动了自己编写的 nginx 配置文件,如下图所示:
浏览器访问http://ip :port,这里我们设置的端口号为 6789,如下图所示:
关闭 nginx 服务 通过配置文件启动 nginx 服务,需要执行如下代码关闭 nginx 服务:
1 2 3 nginx -s quit
好了,服务器——Nginx 安装及 Nginx 静态配置、部署就讲到这里了。
Nginx 简介和安装
简介
这里我就不详细展开说了,网上的资料对 Nginx 都有着详尽的介绍,我仅依照自己的理解,给出我对 Nginx 的认识: Nginx 是一个高性能的 HTTP 和反向代理 web 服务器,它的特点是负载均衡、反向代理
安装 windows 安装
本地 Linux 原始安装
手动安装并手动配置是很繁琐的,不过操作一遍确实很能巩固 Linux 命令,这里给出详细的安装教程: 将来有空的话,我会补充这里的手动安装实操流程(宝塔一键安装真的太便捷了)
宝塔 Linux 一键安装
不论是云服务器还是本地服务器,宝塔 Linux 都是一键安装的,省去了大部分繁琐的配置 你可以在登录宝塔面板之后,在软件商店里下载安装:
也可以在终端里,像本地 Linux 服务器一样,使用命令安装配置 Nginx
服务启停
学会安装、启动和停止 Nginx 服务 这里补充下 Nginx 常用命令:
配置文件
🔥 推荐阅读:
深入理解 Nginx 配置文件:语法、块和常用指令 介绍下 Nginx 目录结构和配置文件的内容:
反向代理和负载均衡
Nginx 反向代理和负载均衡:有效分发流量 我们在本地的 4000、5173、8080 三个端口开启静态站点服务:
在 nginx.conf 文件下,分别开放 8887、8888、8889 端口,反向代理三个静态站点服务 详细配置如下:
1 2 3 4 5 6 7 8 9 10 11 12 13 14 15 16 17 18 19 20 21 22 23 24 25 26 27 28 29 30 31 32 33 34 35 36 37 38 39 40 41 42 43 44 45 46 47 48 49 50 51 52 53 54 55 56 57 58 59 60 61 62 63 http {include mime.types;default_type application/json;sendfile on ;keepalive_timeout 65 ;upstream memory-blog {server localhost:4000 ;upstream memory-docs1 {server localhost:5173 ;upstream memory-docs2 {server localhost:8080 ;server {listen 8887 ;server_name localhost;location / {proxy_pass http://memory-blog;error_page 500 502 503 504 /50x.html;location = /50x.html {root html;server {listen 8888 ;server_name localhost;location / {proxy_pass http://memory-docs1;error_page 500 502 503 504 /50x.html;location = /50x.html {root html;server {listen 8889 ;server_name localhost;location / {proxy_pass http://memory-docs2;error_page 500 502 503 504 /50x.html;location = /50x.html {root html;
有关配置的详细讲解,在配置文件 👆 一栏中了解 修改完配置,我们重新加载配置文件,并启动 Nginx 服务
分别访问本地 8887、8888、8889 端口:
可以看到,我们开启了 Nginx 服务,只需访问 Nginx 给我们开放的端口,就能够访问到对应服务器,获取页面数据 这是因为 Nginx 将我们的请求转发给了服务器,而用户是无感知的,这就是 Nginx 反向代理
静态网站部署 HTTPS 配置
虚拟主机
踩坑经历 访问 Nginx403 错误
先是看了很多解决办法(以上),虽然没有解决,但丰富了我对 Nginx 配置的理解 然后我想到看错误日志,但查看配置发现默认没开启,那就开启错误日志: 错误日志路径:
然后访问 Nginx(记得 nginx -s reload),访问成功,大功告成 这就是访问 Nginx 发生 403 错误的具体解决办法了,很有收获
总结